Intent:
This Resource details the working theory, methods, tips and tricks for 3D scanning specifically focusing on structured light infrared (IR) 3D scanners but applicable to other types of 3D scanning. We use a POP 2 3D scanner from Revopoint. This is a relatively low cost scanner that can achieve the results of a scanner worth tens of thousands of dollars however it dose take a considerable amount of skill to use properly.
How IR 3D scanners work:
To competently operate a 3D scanner and overcome some obstacles, it’s important to first understand some basic working principles and terminology.
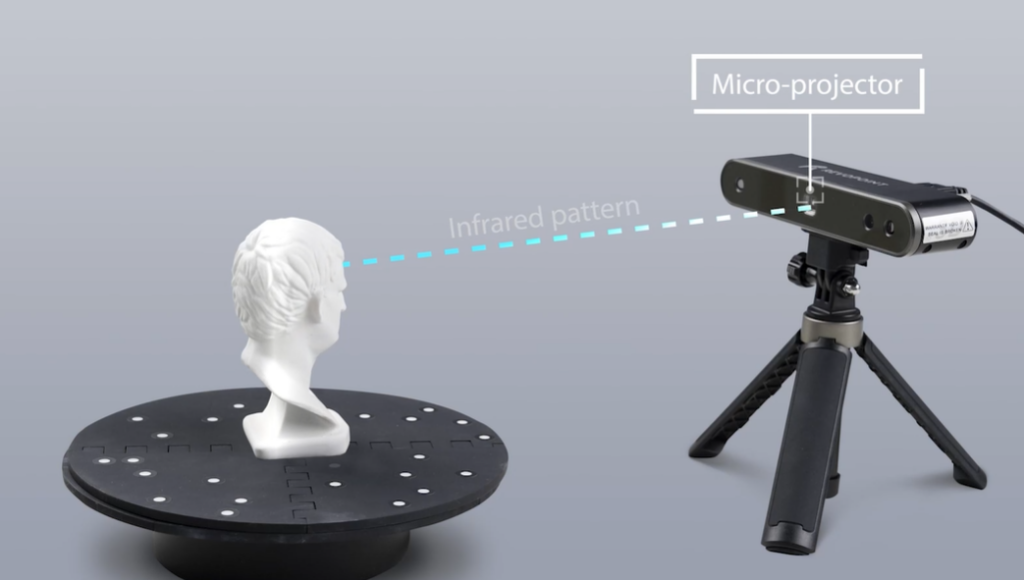
Structured light scanners like this one project a grid or line IR light pattern onto the object.
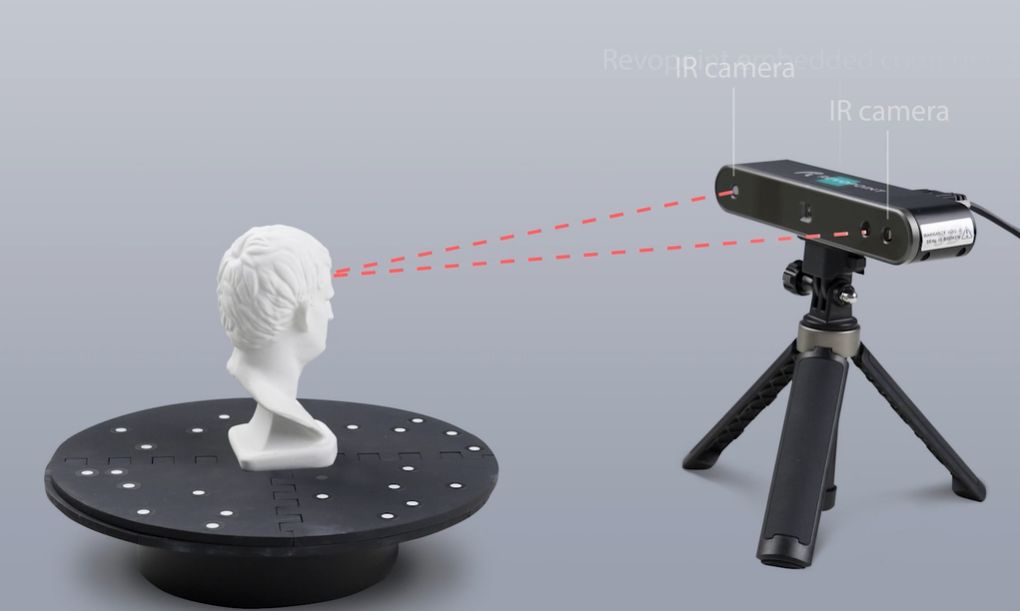
The light pattern is captured by 2 IR cameras. the distortion of the pattern and the position of grid lines measured by the IR cameras is used to calculate the objects position in 3D space. Part of this calculation involves knowing where in space relative to the object the scanner is, this is called localisation or tracking.
To Track its position the scanner uses features or markers to determine where it is. This is similar to determining where you are on a street by recognising landmarks on the side of the road. On a road with no landmarks it would be very difficult to determine where you are along it even if you had a map.
Tracking with markers or features
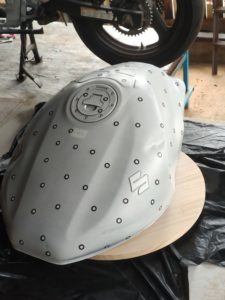
Objects with many complex 3D features can be to tracked by the scanner as it can use the 3D features as ‘landmarks’. Objects with flat or long extruded 3D features can be difficult for the scanner to track. High contrast markers can be used as ‘landmarks’ for the scanner to position itself with respect to the object. The scanner should always be able to pick up at least 3 targets to keep tracking.
Tips
- IR is absorbed by dark colours so you’ll have better results on matt white objects. You can, use a powder developer like D100, baby powder or even paint the object white if you can.
- other light sources could be washing out the IR pattern. Scanning in low light and out of the sun is preferable.
- Plan your passes, You can use some kind of turn table so you don’t have to walk around the thing. It wont need to be motorized you can just slowly spin it by hand. We use a big lazy Susan.
- Your markers can also be on a background or on your turntable. These can be removed in post processing.
- The projector and both cameras need line of sight to the area being scanned. this can cause issues trying to scan close, internal parts or holes.
- vanishing sprays are temperature sensitive. too hot and they will vanish very quickly.
For large objects
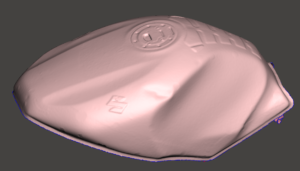
- The point cloud can get too big for the scanner to deal with. Do multiple scans and align them during post processing.
- Consider what’s in your scanners field of view (FOV) when scanning.
- You need to always keep tracking features in the FOV this sometimes means adding features or markers.
- You can use Playdoh or a crumpled towel to create feature markers and easily remove them in post processing.
If you are interested in our 3D scanning services, would like any more information or think we should add something to this resource please contact us on the home page.